Showing posts with label Sewing School Book. Show all posts

Go for the Gold! Olympic Softie


We have Olympic fever over here at Sewing School HQ! As part of this year's Sew a Softie tutorial hop, organized by Trixi at Sew a Softie, we thought it would be fun to make our own softie medals.

While you may not be a super swimmer or the fastest person on Earth, these softie medals allow you to win in activities where you shine. Maybe you'll win the softie medal in pancake eating or whistling or sewing! Kids can choose their strengths or make them for friends and family. No matter what, everyone is a winner!


If you are familiar with the Stuffie project from Sewing School, the process is the same. For a simple medal, draw your design on a light color fabric. We found that the Cookie Coin Saver pattern from Sewing School 2 is the perfect size for a medal. For coloring, you can use crayons or markers. Taping the edges of the fabric to the table, makes for smoother drawing onto fabric.


 Next, cut out the circle shapes. We used felt for the baking.

With good sides facing out, sew the 2 sides together, leaving a hole for stuffing. You can machine sew too.

Stuff your medal with polyfil or small scraps, then sew it closed. Add a ribbon. Be sure to sew on the ribbon securely. 

Wear your medal with pride! 

Instead of drawing on your medal design, you can use felt and thread to stitch it on. The possibilities for this project are endless!

Happy Sew a Softie month!  What will you medal in??


Selfie Pillow

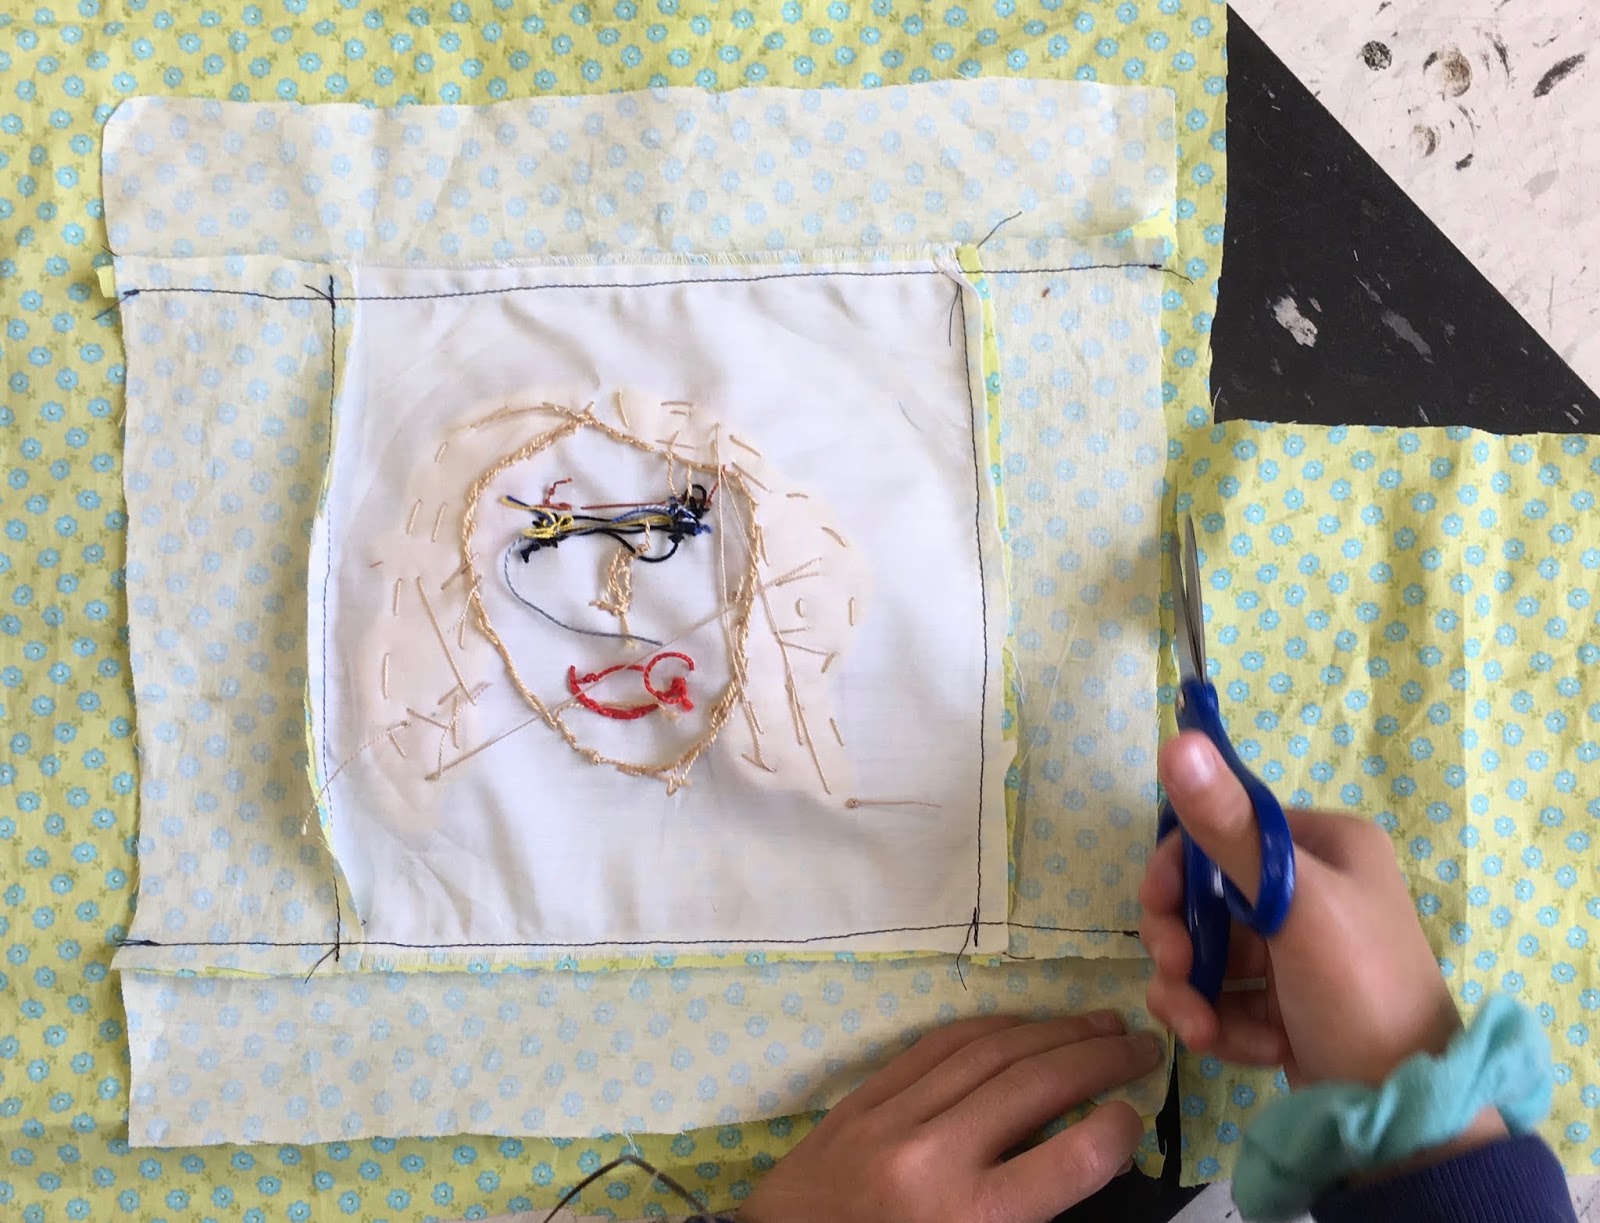
The favorite project at In Stitches! camp this year was the Selfie Pillow. Each pillow is unique as the camper who made it! My favorite part of the project is the hair and I even dedicated an entire page in Sewing School Quilts to different hairstyles. We discovered a new technique for wavy hair this year - ric-rack!

Not only does the Selfie introduce a variety of embroidery stitches, turning it into a quick pillow teaches simple patchwork. In Sewing School Quilts, the project is made into a quilt, but for camp, we thought a pillow would be a fun and quick project. 
 It's me, on a pillow! Follow along with Maddy to make your own selfie pillow.

First, using the directions in Sewing School Quilts, make a selfie square. We used 8x8 squares of muslin for our selfies. This size seems to be a good beginner size.
Next, decide on the pillow fabric and make a quick pattern for the panels that will go around your selfie. Our finished pillows are about 12 inch square.

To make this size, you'll need patterns that are:
2-1/2 x 8 inches (cut 2)
2-1/2 x 12 inches (cut 2)
*Note that you you can just measure and cut the fabric.
 Lay the 8 inch pieces along the sides of your selfie.
Flip over the sides, so that the good sides of the fabric are covering the face. Pin in place so that the edges are even. Using a sewing machine, stitch the fabric strips to the selfie. 
 I see you! Now, Open up the sides and do the same to the top and bottom of the selfie.
 Open up the entire panel and iron the seams on the back flat to one side.
 Using your selfie panel as a pattern, cut out the backing fabric. See how the good sides are facing? This will make it easier to sew and ensure that the back and front are the same size.
Leaving a hole along the bottom for stuffing, sew around the selfie. Stuff until it's soft and then hand sew the hole closed.

Sewing School Fashion Design

This is the book I've been wanting to write for so long! I started sewing mainly to make my own clothes. In high school, I started wrapping pieces of cool fabric around my waist, securing it with a few safety pins, and calling it a skirt. Finally, I learned how to use a sewing machine and started making my very own Zippy Skirts. I have made dozens of these flirty skirts and each has its own personality. Next came dresses and tunics.


At Sewing School Camp, kids were wanting to make their own clothing too.  Many campers would trace their bodies on fabric and attempt to make pants or shirts. The results were often hilarious and sometimes successful, but always a learning experience for both the maker and myself. I began to develop patterns that were simple enough for new sewers, but also cool enough to wear out in public.

The result is Sewing School Fashion Design. Three basic patterns that can be altered and mixed and matched to create an entire wardrobe. Yes, full-sized patterns are included and fit a variety of sizes from age 8 to teens. They also work for smaller adults too! (I'm a size large.)


The Sewing School books have always encouraged kids to make projects their own and clothing is no different. We call these Fashion Mashups. Add a hood to your dress or use 4 different fabrics to make your shorts. Pockets are needed for sure and embroidery adds a big punch.


What would your perfect outfit look like?

I am so excited to have Sewing School Fashion Design out in the world and can't wait to see all the amazing outfits kids start sewing!  You can get your copy on-line at Amazon or Powell's. Please ask for it at your favorite bookseller or fabric store!


On Being a "Sewing Boss"

I was excited to be part of Hipstitch Academy's Sewing Bosses video series. It's so awesome to be part of this wonderful community of sewing teachers. I immediately it off with Megan Avery and we ended up having a fun and informative chat. In fact, we talked for so long, my interview became a 2-part series.


In the interview, I ramble about the Sewing School books, my teaching philosophy, and how I got started teaching kids to sew. We also talked about how I incorporate sewing into my 2nd grade classroom.

Interview Part 1

Interview Part 2

Hop on over to the Hipstitch Academy blog to watch, and while you're there, check out some of the other cool "sewing bosses" that are featured.

Pineapple Pouch


We started Sewing School Camp off with a fun Pineapple Pouch perfect for summer.  These 30 kids ages 5-11 had a great time sewing up theirs and we thought you might like to make one too.


The inspiration for the project came from the Draw It Up Bag in Sewing School.  It's a simple drawstring bag perfect for young sewers.  As with any Sewing School project, there are loads of variations you can make, so use this tutorial as a guide and have fun making it yours!

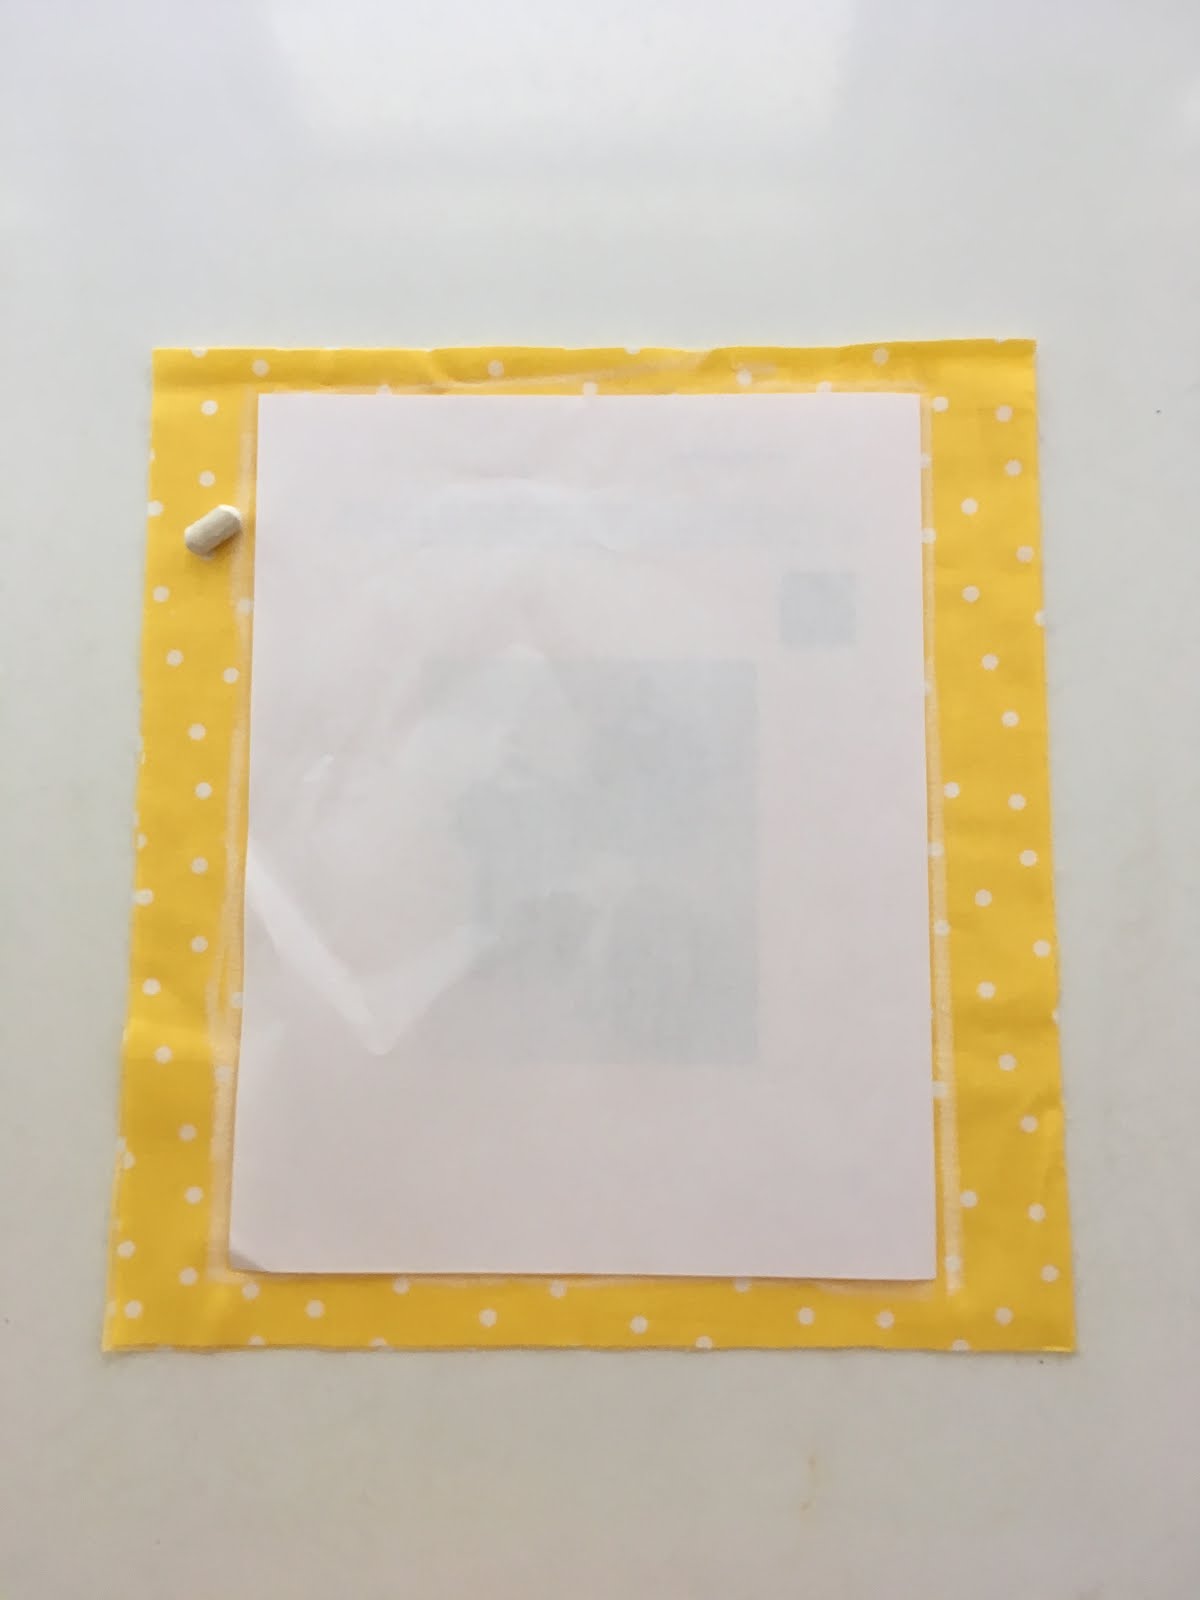
Trace a standard piece of paper (8-1/2 x 11 inches) on yellow fabric 2 times.  Cut out the fabric pieces and put the together so that the good sides are facing out.

Now, measure down on 1 side 1 inch. This is where you will start sewing so you can make a casing for the drawstring.

Start sewing at the 1 inch mark.  Sew around 3 sides of the pouch.  You can use a running or a whip stitch.

Fold down the top 1 inch where you began sewing to make a casing, a little pocket where the drawstring goes.


Wrap a 4 inch wide strip of green felt around the top of the pouch.  Match up the bottom of the felt to the bottom of the fold. Pin it onto the fold and sew around the bottom with a running stitch. Be careful not to sew through both sides of the pouch.  Tip:  At camp, first-time sewers sewed around the casing first and then hot glued the green felt onto the casing.

Measure a piece of yarn or ribbon 3 times the width of the pouch. Using a safety pin, thread the string through the casing.  Tip: At camp, my daughter Phoebe discovered that plastic needles worked perfectly for this small bag!

You're almost done! Turn the bag inside out.  Cut out pineapple top leaves, careful not to cut the yellow fabric.

Turn the bag right-side out and fill with summer essentials!

Stuffed Animal Vet Clinic


One of the bonuses of being able to sew is that you can repair stuff.  Sewing is super useful!  Hosting a Stuffed Animal Vet Clinic at your school or community allows young sewers to use their sewing skills to help others while repairing loved stuffies.  I believe it's a much needed community service project!  Little Stuffed Animal Vet Clinics should start popping up all over.  But I digress.....

This month, Sewing Club hosted a Stuffed Animal Vet Clinic for our school.  We collected more than 30 injured stuffies and restored them back to life. The kids were so proud and really took their time with the repairs.  Some repairs required good problem solving skills and even teamwork.

Thinking about hosting your own Vet Clinic?  Here are some tips:
*Get the word out!  Let people know what you're doing a few days in advance.  Kid-made signs and announcements are the best!

*Decorate a collection box.  We placed cardboard animal carriers around the school to collect the stuffies, but decorated cardboard boxes would work too. Limit collection to 1 or 2 days before the event.

*Use tags or tape to ID the stuffies. For ours, we made sure we had the owner's name and classroom teacher so that they could be returned.  Shipping tags from an office supply store work well.

*Gather vet supplies: You'll want to make sure you have plenty of brown, black, and white thread on hand along with a variety of colors. You might also need some stuffing and perhaps some felt to make prosthetics. (yes, you read that right!)

*If time allows, add an extra.  We had the vets right a quick note on the back of the tag and make a fabric bandage or bandanna for the stuffie.

*Return repaired stuffies to their owners right away!

Hope you're inspired to host your own Stuffed Animal Vet Clinic!  Sewing School has more tips for repairing injured animals.

Sew a Softie Day is Coming!


I am so proud to be part of an amazing group of bloggers, sewists, and crafty folks who are joining Trixi Symonds of Coloured Buttons for Sew a Softie Day!

What is Sew a Softie Day you ask?  Well, it's a day to celebrate sewing with children of all ages across the globe.  For new sewists, Stuffies are the perfect way to start.  My number one project to sew with kids is the Stuffie - a self-drawn picture you cut out, sew up, stuff, and hug.


Sewing School will join in the fun on July 8.  We are teaming up with the Memphis Brooks Museum of Art to create a whimsical stuffie inspired by the museum's exhibitions.

And here’s the official list of awesome simple to sew softie tutorials:
July 1
July 2
Maggy Woodley http://www.redtedart.com
July 3
July 4
July 5
July 6
Sandi Sawa Hazlewood http://craftyplanner.com/blog/
July 7
July 8
Stephanie Woodson http://swoodsonsays.com
July 9
July 10
July 11
July 12
July 13
July 14
July 15
July 16
Angie Wilson http://gnomeangel.com


Sewing School 2 in French!


Bonjour!  Welcome to L'école de couture aka Sewing School 2.  We are pleased to announce a French version of the book published by Eyrolles.  How fun to think of little French sewers learning with Sewing School!

My daughter was thrilled to see her thought bubble in French!  "I didn't know I could think in French!"

The book stays true to the original including the binding and full-sized patterns.  Of course, all of the measurements are in metric units.


I was thinking about how English speaking children who want to learn French would benefit from L'école de couture.  The simple text and step-by-step directions are perfect for practicing a new language while crafting!

To find out more, visit the L'ecole de couture site.  Click on the "extraits" tab for page samples.  It's also fun to follow Eyrolles on FaceBook and Instagram.  C'est trés bon!

Sewing at the Garden

 This week, I had the opportunity to sew with the kids at the Carpenter Art Garden here in Memphis.  What a wonderful organization that really connects kids to art, nature, gardening, and culture.  I decided to make a felt version of the Just Right Pouch from Sewing School.
 I precut the fabric and threaded a bunch of needles so that the kids could sit down and begin to sew!  If you are interested in taking a sewing project to a group like this, my advice it to be VERY prepared.  Have everything ready to go so that you can spend time helping the kids sew, not getting materials ready.  Also, a simple, yet practical project like the pouch appeals to everyone.  
The scene at the Art Garden.  There were 6 craft tables going on, bikes being repaired, snacks passed out, and tutoring going on while I was there.  My two children (ages 8 & 11) helped out and I also recruited a teenage volunteer to help with the sewing.
The kids were excited to sew!  We had many first-time sewers join in, but many were experienced and so happy to make something.
 Many kids talked about learning to sew from their grandmothers and mothers.   
This young man sat by me all afternoon making pouch after pouch.  His mother taught him how to sew, and he was busy making pouches for the entire family!  I hope to visit the Carpenter Art Garden again and keep them sewing.