Showing posts with label hug. Show all posts

Sew a Fluffy Cloud Softie


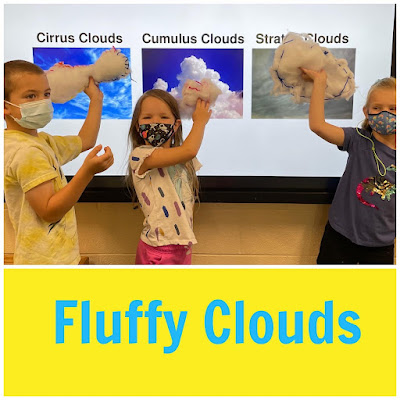
As part of the 2022 Sew a Softie Global Kids Sewing Party, I stitched up some Fluffy Clouds with a group of 4 and 5 year olds. Yep, preschoolers can sew too! It's all about having the right tools for little hands to use. 
Materials Needed: 2 layers of low-loft batting, markers, scissors, plastic needles and lacing strings. You can also make clouds using felt and regular sewing needles and thread. 
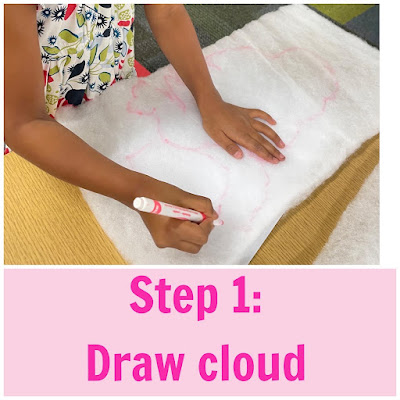
After learning about how clouds are formed and drawing several clouds on paper, draw your cloud shape right onto the double-layer of low-loft batting. Drawing on batting is a bit tricky, and you might need to combine clouds to get the right shape, but it is a fun, new experience. 
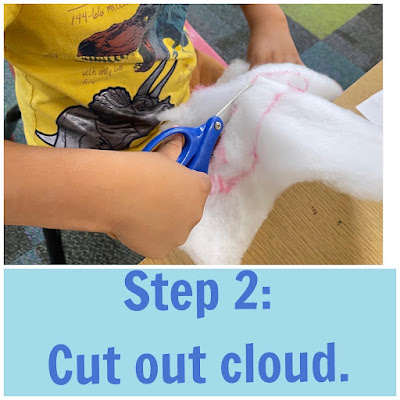
Next, cut out the cloud shapes. Be sure to cut through BOTH layers of batting and take your time! Save the batting scraps to use as stuffing. 
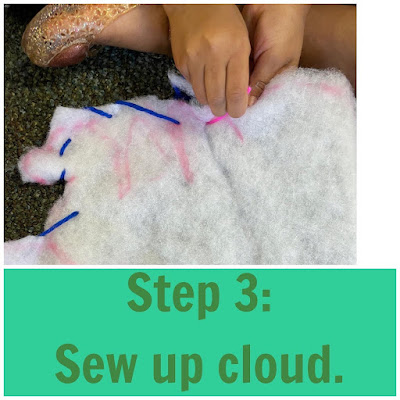
Now it's time to sew up the clouds! We used plastic needles and lacing strings, but you could also use regular needle and thread for this. The plastic needles slide through the batting easily. 
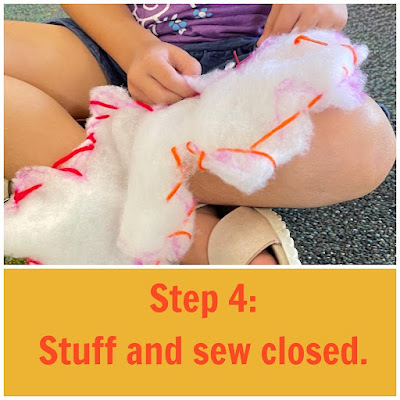
Be sure to leave a small hole (about the size of your hand) for stuffing! Use the batting scraps or polyfil to stuff the cloud until it's soft and squishy. Now, sew the hole closed and be sure to make a knot at the end of sewing.
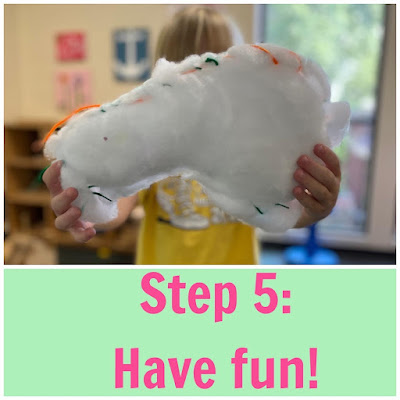

You have a fluffy cloud! They make great pillows, are great for throwing up in the sky, and enjoy getting hugs too. 

What kind of cloud did you make? A cirrus, cumulus, or stratus cloud?

Sew a Softie is a world-wide initiative led by the amazing Trixi Symonds. Follow along on IG at @sewasoftie to see all the amazing tutorials and kid-friendly projects.  

Go for the Gold! Olympic Softie


We have Olympic fever over here at Sewing School HQ! As part of this year's Sew a Softie tutorial hop, organized by Trixi at Sew a Softie, we thought it would be fun to make our own softie medals.

While you may not be a super swimmer or the fastest person on Earth, these softie medals allow you to win in activities where you shine. Maybe you'll win the softie medal in pancake eating or whistling or sewing! Kids can choose their strengths or make them for friends and family. No matter what, everyone is a winner!


If you are familiar with the Stuffie project from Sewing School, the process is the same. For a simple medal, draw your design on a light color fabric. We found that the Cookie Coin Saver pattern from Sewing School 2 is the perfect size for a medal. For coloring, you can use crayons or markers. Taping the edges of the fabric to the table, makes for smoother drawing onto fabric.


 Next, cut out the circle shapes. We used felt for the baking.

With good sides facing out, sew the 2 sides together, leaving a hole for stuffing. You can machine sew too.

Stuff your medal with polyfil or small scraps, then sew it closed. Add a ribbon. Be sure to sew on the ribbon securely. 

Wear your medal with pride! 

Instead of drawing on your medal design, you can use felt and thread to stitch it on. The possibilities for this project are endless!

Happy Sew a Softie month!  What will you medal in??


NY State Sheep and Wool Festival - Kids' Crafts!


I'm over the moon to be leading the Kids' Activities at the 2020 NY State Sheep and Wool Festival! Although the event is virtual this year, it's still packed with fun and TONS of great workshops, lectures, and fun. Hope you can join me for some woolly fun!

While the workshops are FREE with your $5 admission fee, there is advance registration required. Click here to find out more.

Kids of all ages will enjoy these traditional crafts with a modern twist. 

Yarn Dolls! These little dolls are so simple, yet very addicting to make. Get ready to use up all your bits of yarn and scraps. Saturday, October 17, 10am EST


Paper Plate Weaving! Say hello to fall with a door hanging that even the youngest crafters can manage. Saturday, October 17, 1pm EST.

Baa Baa Softie Sheep! Stitch up a cuddly sheep of your very own from an old sweater and felt. Sunday, October 18, 1pm EST.

Hope to see you at the NY State Sheep and Wool Festival!

Cupcake Softie


Learn to sew this fun and easy Cupcake Softie as part of Sew a Softie month hosted by Trixi at Sew a Softie.  I set the video up like a workshop, so kids (and adults!) and follow along with me and learn tons of sewing skills while making their cupcakes.
 

Join in the fun by following Sew a Softie on Instagram and tagging any softies you make #sewasoftie.


Squidget! for Sew a Softie 2019

Happy Sew a Softie Month! I'm excited to join in with other kid-friendly makers across the globe to share original stuffie patterns that you can make with and for children. For more information and a list of tutorials, visit the amazing Sew a Softie organizer Trixi at Coloured Buttons. 


What's a Squidget you ask? A squishy fidget of course! Last school year I had some students who needed fidgets to help them focus and remain relaxed during whole group learning times. After a few trials and errors and some input from my students, the Squidget was born. They worked like a charm and kept the kids focused, calm, and engaged.


These little guys pack a big punch. Taking a cue from taggie blankets for babies and toddlers, these hand-sized pillows have a variety of ribbons and textures built in for sensory play. The bonus is a marble tucked into the middle of the Squidget for the ultimate squishy fidget experience. We stitched up some Squidgets at camp and the kids loved them and enjoyed finding the trims and ribbons that felt best to them.


OK, let's make a Squidget! Materials needed:
*fleece or other soft fabric
*a variety of ribbons, lace, elastic, and trims
*a marble
*poly-fil for stuffing
* hand sewing supplies (yes, you can machine sew them if you want)


Cut two pieces of fabric into the same sized squares that will fit into the palm of your hand. Ours were about 3 inches. Start sewing along one side. Lay the first ribbon between the two layers of fabric.


Keep sewing, taking care to sew the ribbon down tight. After you sew on a ribbon, it's best to give it a little tug to make sure it's stitched well.  Keep sewing around the Squidget and adding more ribbons and trims until you get to the last side.

After sewing up three sides, stuff the Squidget halfway then add a marble. Add more stuffing until you like the way it feels. Stitch up the last side adding a final ribbon.


Squish and fidget away!


In true Sewing School fashion, you can make it your own by adding a face, stringing a few beads along one of the trims, changing the shape, or adding additional marbles.


Happy Sew a Softie Month!

Sew a Softie Story


Once upon a time there was a group of young sewers who wanted to sew a softie, but not just any softie, a Magical Unicorn softie!


They had heard about the adventures of Uni the Unicorn and fiercely believed that unicorns (and little girls) were very real indeed.


They gathered their supplies and began to draw their unicorns' faces. Each face was different. Some unicorns were smiling, some were sleepy, and a few were sad.


Next, it was time to cut, cut, cut out all the parts that make a unicorn a unicorn like a horn and mane. Some had yellow horns, and few were pink!


Finally, the pieces were pinned and sewn together. Sewing through all the layers of felt and fabric was a little tricky, but these little girl sewers did not give up! Not one sewer poked themselves or said it was too hard.


And you know what's next, right? It's stuffing time! This is the best part where a softie becomes a softie!  Don't forget to sew up your hole so you can go on Magical Unicorn adventures!


And they all lived happily ever after!  (Even the little girl who decided to make a dog instead of a unicorn.)  Happy Sew a Softie Month!


Sew a Softie 2018


If you sew with kids, then you probably know about Sew a Softie organized by the lovely Trixi of Coloured Buttons. It's a month long tutorial extravaganza of softie tutorials with kids in mind. 

My contribution was this Magical Unicorn Softie.  The best part is that you can design the face, mane, and horn!  It's fun - you should make one.

Want to see all the Sew a Sofie awesomeness?!  You can find the link up to all the posts here.

Happy Sew a Softie Month!


Unicorn Softie


Hooray! It's my turn to share a fun project as part of Sew a Softie month hosted by Trixi at Coloured Buttons.

If you have a little girl in your life, chances are you are aware of unicorn obsession.  Rainbow unicorns are even better! While there are several unicorn projects out there, I set out to design one that was easy for young sewers to create independently. These little square-faced unicorns fit the bill perfectly! Also, if unicorns aren't your thing, this project can be transformed into any animal your heart desires.

So, let's get to it.  The materials are simple - you'll need some muslin or light colored fabric, a felt square, lots of felt scraps, stuffing, markers, and sewing materials.

We made our pillows 8x8 inches, but you can make the project any size you want.

Fabric markers are easy to find, but any kind of marker will work. You can also color the face with crayons.

Use scraps to design your unicorn.

This might be tricky for young sewers, but it also teaches a new skill.

Remember to stitch through all the felt pieces so that the mane and horn stays in place.


I made these direction photos to print and use when sewing unicorn softies with my campers.  Get a copy here.

Happy Sew a Softie Month!