Showing posts with label crafty. Show all posts

Sew a Fluffy Cloud Softie


As part of the 2022 Sew a Softie Global Kids Sewing Party, I stitched up some Fluffy Clouds with a group of 4 and 5 year olds. Yep, preschoolers can sew too! It's all about having the right tools for little hands to use. 
Materials Needed: 2 layers of low-loft batting, markers, scissors, plastic needles and lacing strings. You can also make clouds using felt and regular sewing needles and thread. 

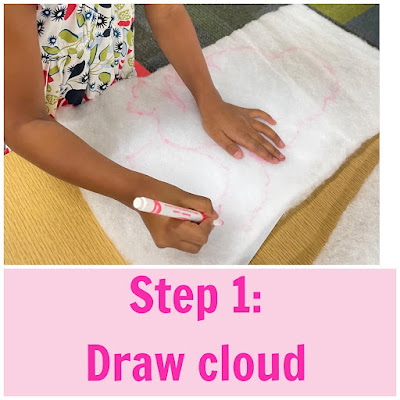
After learning about how clouds are formed and drawing several clouds on paper, draw your cloud shape right onto the double-layer of low-loft batting. Drawing on batting is a bit tricky, and you might need to combine clouds to get the right shape, but it is a fun, new experience. 

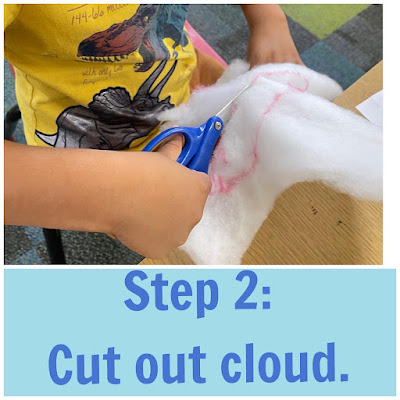
Next, cut out the cloud shapes. Be sure to cut through BOTH layers of batting and take your time! Save the batting scraps to use as stuffing. 

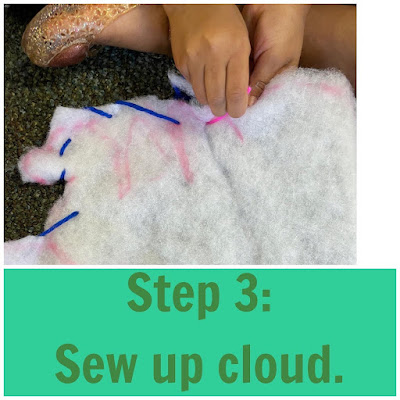
Now it's time to sew up the clouds! We used plastic needles and lacing strings, but you could also use regular needle and thread for this. The plastic needles slide through the batting easily. 

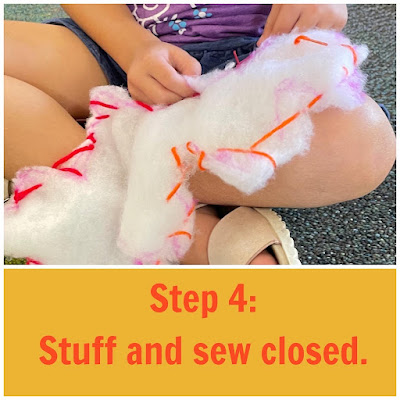
Be sure to leave a small hole (about the size of your hand) for stuffing! Use the batting scraps or polyfil to stuff the cloud until it's soft and squishy. Now, sew the hole closed and be sure to make a knot at the end of sewing.


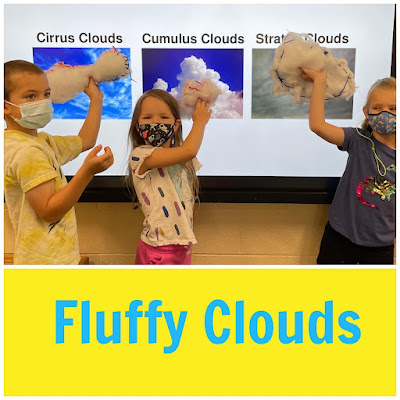
You have a fluffy cloud! They make great pillows, are great for throwing up in the sky, and enjoy getting hugs too. 

What kind of cloud did you make? A cirrus, cumulus, or stratus cloud?

Sew a Softie is a world-wide initiative led by the amazing Trixi Symonds. Follow along on IG at @sewasoftie to see all the amazing tutorials and kid-friendly projects.  

Squidget! for Sew a Softie 2019

Happy Sew a Softie Month! I'm excited to join in with other kid-friendly makers across the globe to share original stuffie patterns that you can make with and for children. For more information and a list of tutorials, visit the amazing Sew a Softie organizer Trixi at Coloured Buttons. 


What's a Squidget you ask? A squishy fidget of course! Last school year I had some students who needed fidgets to help them focus and remain relaxed during whole group learning times. After a few trials and errors and some input from my students, the Squidget was born. They worked like a charm and kept the kids focused, calm, and engaged.


These little guys pack a big punch. Taking a cue from taggie blankets for babies and toddlers, these hand-sized pillows have a variety of ribbons and textures built in for sensory play. The bonus is a marble tucked into the middle of the Squidget for the ultimate squishy fidget experience. We stitched up some Squidgets at camp and the kids loved them and enjoyed finding the trims and ribbons that felt best to them.


OK, let's make a Squidget! Materials needed:
*fleece or other soft fabric
*a variety of ribbons, lace, elastic, and trims
*a marble
*poly-fil for stuffing
* hand sewing supplies (yes, you can machine sew them if you want)


Cut two pieces of fabric into the same sized squares that will fit into the palm of your hand. Ours were about 3 inches. Start sewing along one side. Lay the first ribbon between the two layers of fabric.


Keep sewing, taking care to sew the ribbon down tight. After you sew on a ribbon, it's best to give it a little tug to make sure it's stitched well.  Keep sewing around the Squidget and adding more ribbons and trims until you get to the last side.

After sewing up three sides, stuff the Squidget halfway then add a marble. Add more stuffing until you like the way it feels. Stitch up the last side adding a final ribbon.


Squish and fidget away!


In true Sewing School fashion, you can make it your own by adding a face, stringing a few beads along one of the trims, changing the shape, or adding additional marbles.


Happy Sew a Softie Month!

7 Spooktacular Halloween Party Crafts

Don't let the little monsters get out of hand at your class Halloween party!  Channel their energy into making a fun and creative project.  Here are some fun projects from Halloween pasts that will put the "Boo!" into your get together!


Sewing Club Gives Back

 It has become a wonderful tradition to make a gift for others during our last Sewing Club session.  This year, we worked in pairs to make these sweet Scrap Fabric Crosses.  They will be given to the Grace-St. Luke's Episcopal Church's pastoral care and passed on to individuals who are in need of some TLC.
 The kids were paired up in multi-aged groups and had fun working together to make these special crosses.
They are so simple, yet satisfying to make.  Plus, they are a perfect way to use up scraps!  We pre-made the crosses with sticks for the kids.  A full tutorial may be found here.
Once complete, the pairs worked together to write a quick note to attach to the cross.
 I love the concentration and care that went into each cross and card.
I can't believe that the first session of Sewing Club is already finished!  We are already thinking of fun ideas for our next session which begins in January.

Yarn Craft: God's Eye

 Here at Sewing School HQ we are lucky to be the recipient of a lot of wonderful donations, including a ton of yarn.  The box above is only a fraction of our stash!  While we love love love receiving crafty materials, it can be a little overwhelming.  What do you do when you have too much yarn?  Give  your students a yarn challenge, of course!
The big hit of the afternoon was the God's Eye, or at least versions of them.  Here's a good kid-friendly tutorial. 
 With some popsicle sticks and a bunch of yarn, you can quickly make a slew of these!
I would also like to note that this is the calmest our Sewing Club has been in awhile, lots of crafters thinking and winding yarn.
Others chose to use the yarn in less expected ways such as fringe for this "Super Awesome Tent."

Woodworking....Kinda Sorta

 On a recent trip to the library, this book was discovered and brought home.
During a walk around the block, sticks were gathered to make a scroll.  They were so proud that they made it all by themselves and it looks just like the picture.
Woodworking can be fun. Even kinda, sorta woodworking.  Maybe next time, the project will involve some actual woodworking!

Tin Can Stilts


Nothing beats walking around on a hot summer afternoon on some homemade tin can stilts!
We just finished reading Ramona and Her Father (quite a heavy book for a second grader, but that's another discussion) and in it, Ramona makes tin can stilts.  So, we did too.  There are many ways to make tin can stilts, but we made ours like Ramona.
Here's what you need:  2 cans (we used coffee cans), hammer, big nail, kitchen twine or jute, sharpie, and scissors and masking tape (not pictured).
Make marks with Sharpie on each side of the top of the cans.
Hammer a big nail into each Sharpie dot you made to make a hole.  Phoebe is doing a good job posing for me here - I helped her hammer.
Thread the jute down through one side and up through the other.  We put masking taped on one end to help thread it through.  Stand on the cans and pull up the string to figure out how long each handle should be.  Cut the string and tie the ends together.
Have fun!  Ramona is right - they are very loud and fun to walk around in.
But be careful, because you might fall and the strings can break after awhile.

Have fun on your tin can stilts!

Summer Reading: Made to Play!

Remember my big stack of summer reading? Well, I've started looking through them and am excited to share my thoughts with you.

I was excited to get Joel Henriques's book Made to Play!- I'm a big fan of his blog Made by Joel.  It's not just that he's a crafty dad, but it's the kind of things he makes - from wood working to sewing, he does it all.  I like that.
These little scrap wood dollhouses are super cute.  They also caught my husband's eye and we talked about making some for my classroom next year.  I can see them really working in the blocks area.
 There are several sewing projects as well.  While explicit directions are given, crafters are encouraged to do their own thing and create original designs.
Which brings me to the Zoo Blanket.  Such a great design, right?  I immediately thought about my Zoom Zoom mats and how I could do the same thing for animals.
 So I did.  Really, that is what craft books are for me, a jumping point for inspiration and creativity.

This is the outside - some cute vintage farm fabric I had in my stash.  Open it up and...
 ...you are at the farm!  My Moo Mat is the size of a felt square. 
 The grass is fringy and loose so that kids can play with it.
The little plastic animals live in a red Moo barn that closes tight with velcro- we don't want any escapees!
The book is filled with so many fun toys for kids.  Most of the toys and games are for adults to make for kids, not for kids to make themselves. Well, at least that's what I think.  But Phoebe has her own ideas and thinks she'll try her hand at the Discovery Belt.  At any rate, we both think we need a wood burner - that looks like fun!