Showing posts with label winter. Show all posts

Snowman for Every Story - a Tutorial


I designed this simple snowman face for a Sew Me a Story event at my school. It turned out so cute and everyone loved it.
The beauty of this project is that it can easily go with any snowman themed story and is open to interpretation-something I always love.

So, gather up your favorite snowman stories, some batting and a few other materials, and get ready to create!

Materials needed:
You can make this project with foam sheets, plastic needles and lacing strings like I did for toddlers, or use felt, craft thread chenille needles if sewing with older kids.
*medium-loft batting (this weight is still easy to sew through and allows the face to keep its shape for hanging)
*foam sheets or felt squares in a variety of colors
*hole punch if using foam
*sewing supplies: plastic needles and lacing string or chenille needles and craft thread
*8-inch plate or circle for pattern

Step 1: Trace the 8-inch plate or circle onto the batting and cut out. You need 1 circle for each snowman face.

Step 2: Cut out fun hats, mouths, noses, and eyes from the foam or felt. If using foam, punch at least 2 holes in each shape.
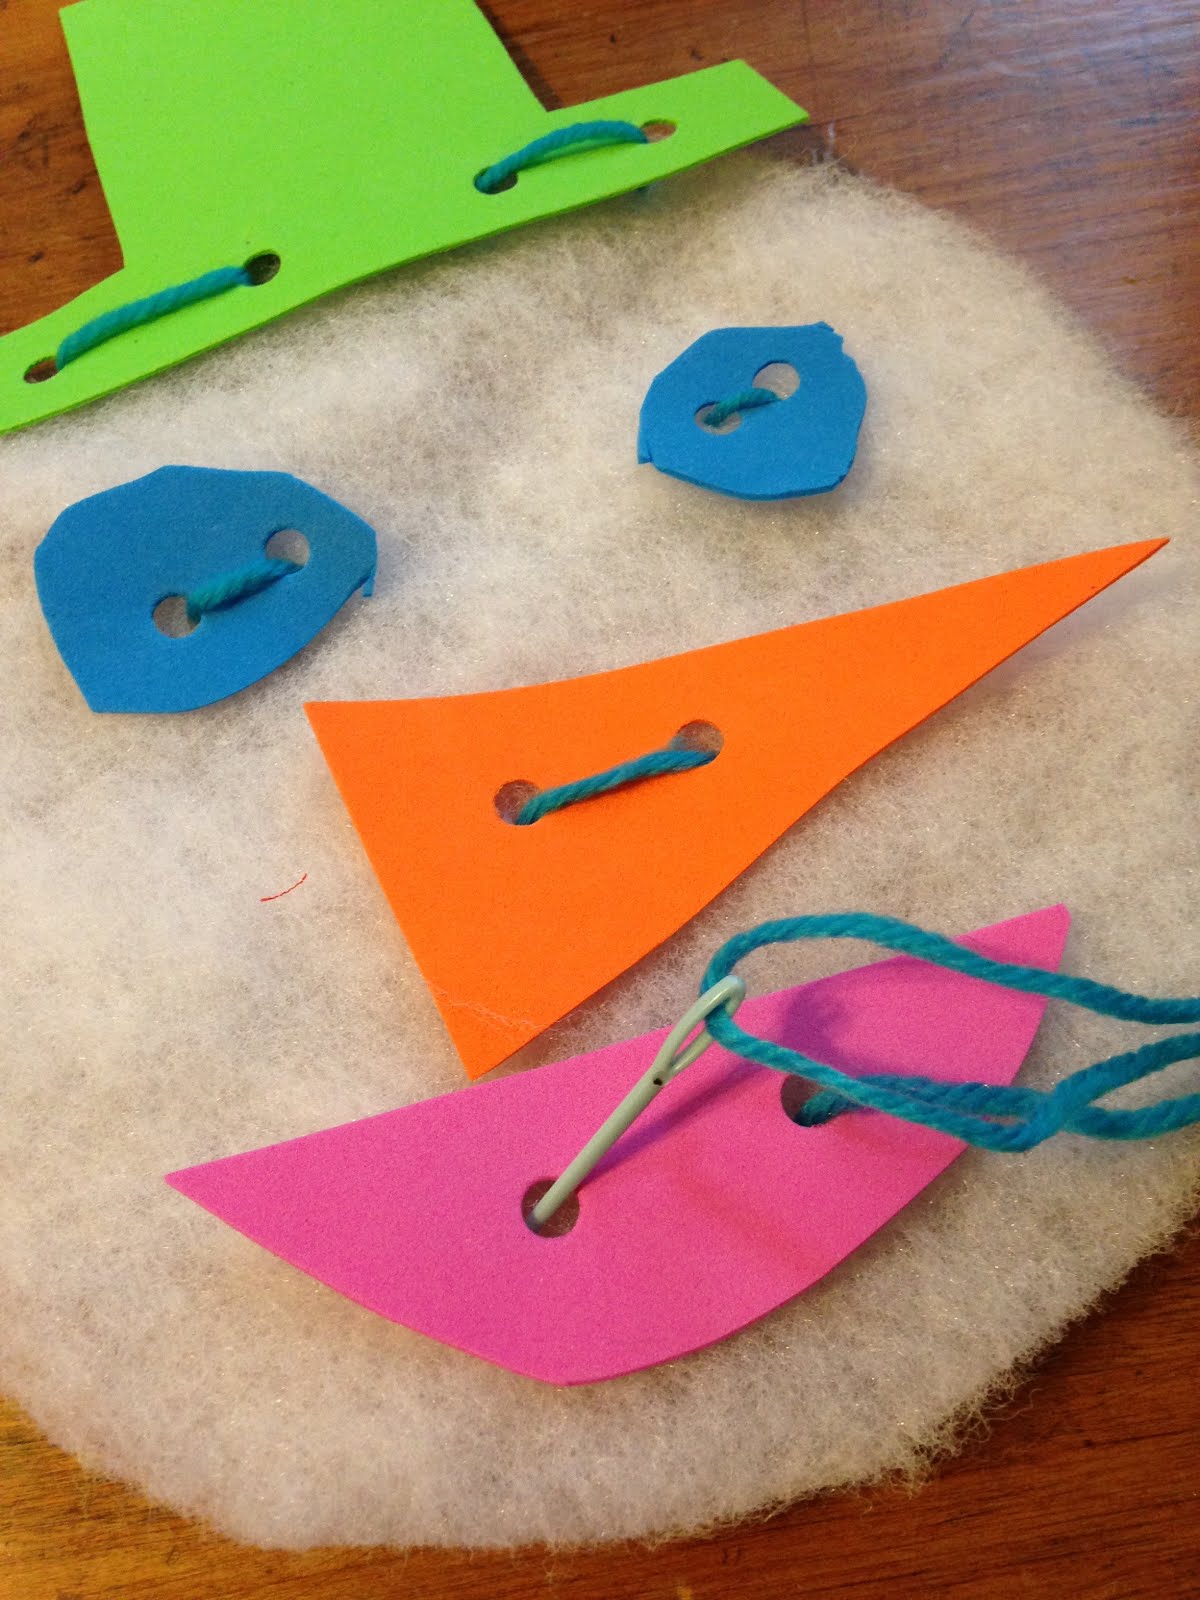
Step 3: Tie a knot onto the end of your string and begin to sew on the face shapes.

Step 4: You can keep using the same string to sew on the face, just move the string and needle around the back. When you are finished, knot off. Use the extra string to make a hanger on the top of the hat.

Now, all we need is snow....

Sewing with "The Mitten"


What a fun morning we had at Toddler Sewing and Story Time this month!  After our awesome librarians read several snow-themed books including this pop-up version of "The Mitten", we had fun sewing our own mittens and retelling story.


The mitten is made of low-loft batting, which is the perfect snowy white material for sewing when you're using plastic needles and lacing yarn.  I used Jan Brett's amazing drawings for the mitten pattern and animals.  Yes, you could make the mitten out of paper, but that's not quite as much fun!


 First, the kids sewed around the mitten with a little adult help.


Next, they colored the animals, which have a few holes in each for easy lacing.


The kids loved lacing the animals and putting them into the mitten at the end.


Not only were they strengthening fine motor skills, but we talked about animals, colors, order, and story elements as they worked.  That's a lot of learning for these little sewers!


Many of them wanted to wear their mittens too!  Luckily, in Memphis, the temps don't get too cold, so a batting mitten is realistic!

Warm Up with Wintertime Sewing

 To start off the new semester of Sewing Club, we stitched up some cozy wintertime accessories.
 I cut up some cute fleece into large rectangles, enough for everyone to get at least 2 pieces.  We discussed the stretchy side of fleece and how it's not only soft, but doesn't fray!
 A favorite project was the Hat Attack! from Sewing School.  The addition of pompoms on top are just too cute!
A super fun cowl was made from stitching two pieces of fleece together.

Did you know that if you sew one rectangle up on the long sides, you have a quick muff?!  Thread some yarn through it and tie it around your neck, then tuck in your hands. Ahhh....toasty warm!
 Wristwarmers are so much fun!  Click here for an easy tutorial.  This time, however, instead of leaving a thumb hole during the sewing process, the kids just sewed up the sides and cut out a slit to stick their thumbs through - much easier!
Stay warm this winter!

Sewing with The Mitten


 What fun we had at Toddler Sewing Club last week!  We stitched up these adorable mittens inspired by Jan Brett's The Mitten, a winter favorite!

So much is going into this simple activity.  The kids are learning basic sewing which strengthens fine motor and focus skills, animal and color recognition, sequencing, and story re-telling!  Whew!
Materials are simple  - we used low-loft batting for the mitten, plastic needles, and lacing strings.  The Mitten templates came straight from Jan Brett's awesome website.  I copied the animal template onto cardstock.
 First, we read the book to the group.  We had several copies on hand for repeated readings and sequencing.
 Next, we sewed up the mittens.  I had them ready to go with a needle and thread attached to a set.  The plastic needles slide right through the batting and the kids really feel like they are sewing fabric.
 First time sewers had a little support from parents.
 Next, the kids colored the animals.  I ran them off on cardstock then cut them out and punched a few holes into each animal.  Older kids could easily do this step themselves.
 Lacing the animals together was a lot of fun.  Some kids really focused on the order of the animals from the story, while others just wanted to put them together.  If you are focusing on sequencing, it would be easy to number the animals before copying them.
Time to put the animals into the mitten!
As a goodbye, we gave each sewer a pair of small mittens of their own to take home.  They were so excited!

I'm sure there will lots of retelling of The Mitten this winter!

Batting as Fabric

This winter I have discovered a new fabric - batting!  Traditionally used in the middle of quilts, it also is perfect when stitching up winter crafts.  I used low-loft batting because that's what I have on hand, but I would think a thicker batting would give you better coverage.

Do you spy the batting above as the Santa beard and mustache?
It's pretty easy to work with and you can cut it just like regular fabric.  I also discovered that plastic needles slide right through it making it ideal for my upcoming Toddler Sewing Club project, The Mitten.  (More on that to come!)
The trick to sewing with batting, is that it can tear and be stretchy, so you have to think about how you can use it.   Like, I wouldn't make a batting purse and fill it with heavy things.
It's perfect for stitching up a sweet little snowman!

I'm sure we'll have fun finding more uses for batting this winter sewing season.  Do you have some ideas?!

Snowman Steps

In Writer's Workshop, we wrote steps for creating a snowman.  The goal was to write the steps using time words such as first, next, then, and last.  Before writing, we told numerous stories using steps.
The kids each chose how to create a snowmen.  Some drew, others built, and one even told how to make a collage snowman.  Step-by-step illustrations accompanied the writing.  Everyone was successful in the work and enjoyed the process.
After they were finished writing, the kids tested their steps on each other.  The author read the steps while a friend drew the picture.  The results were often comical.
 This is the original steps to drawing a snowman.
Here is what the friend drew.  What happened?!  The authors quickly went back and edited their work so that the steps were more accurate. Many retested the changes on friends.
While my initial intention was to just have the kids write steps in order, the idea to test out the steps occurred to me after looking at the work.  By testing out the steps on each other, the kids were able to discover their own mistakes and were eager to make changes.  What a way to learn!  I look forward to repeating this process later in the year.

Snowmen Stuffies

I had to share these adorable stuffed snowmen that were stitched up by Mrs. Shannon's kindergarten class.  They look so cute hanging from her ceiling.  Bonus for me, Frankie is in her class this year and I can't wait until he brings his snowman home!
She had a basic snowman shape out of white felt for the kids to decorate using felt scraps and buttons.  The felt scraps were glued on using craft glue while the buttons were sewn on.  Next, they sewed up the snowman and stuffed it.  Last, came the hat.  It's a separate piece made from black felt.  The hat was sewn together, stuffed, and stitched onto the snowman.
While they did take a lot of work, the results are fantastic!  Each snowman reflects the individual child's personality and allowed the kids to work on a project over a time period.  So many times, we are looking for instant gratification.  It's nice to have a project that takes time and patience to complete.

Toddler Sewing: For the Birds

Toddler Sewing Club for kids ages 2 and 3
Tuesday, January 14, 9:30am
free fun for you and your child!

register at enroll@glschool.org 
At this fun parent and child event, toddlers will delight in making these cute bird feeders sewn up with love and Cheerios!  It's never to early to learn the joy of sewing for others. 

If you are unable to join us, I'll be sure to post the how-to and highlights from the event!

Dreaming of Winter Hats

More Hat Attack! hats were stitched up during our first Sewing Club meeting of the semester.  It was 70 degrees (yes, 70!) when we made these, so we had make our own winter scene.  One kid suggested putting up a winter scene on the overhead, so we did.  Instant snow!