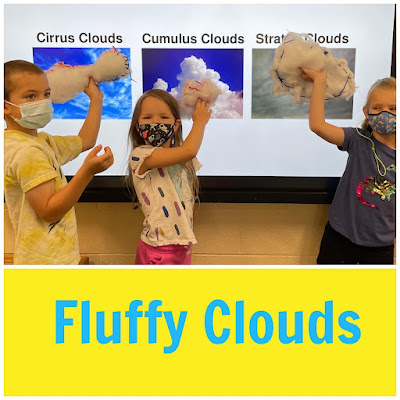
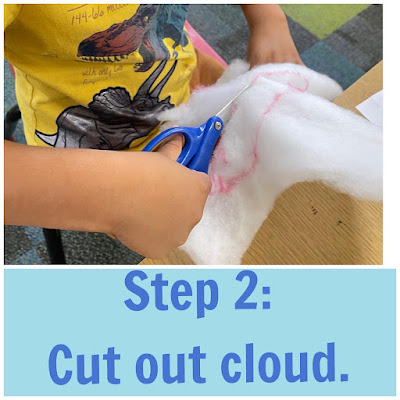
Sew a Fluffy Cloud Softie
Go for the Gold! Olympic Softie
Next, cut out the circle shapes. We used felt for the baking.
With good sides facing out, sew the 2 sides together, leaving a hole for stuffing. You can machine sew too.
Stuff your medal with polyfil or small scraps, then sew it closed. Add a ribbon. Be sure to sew on the ribbon securely.
Wear your medal with pride!
Instead of drawing on your medal design, you can use felt and thread to stitch it on. The possibilities for this project are endless!
Happy Sew a Softie month! What will you medal in??
Sew an Elf Hat!
So, please click here to enjoy the original post. These kids are now driving and are in high school!
A few elf hat tips:
- We make our elf hats out of fleece, but felt works well too.
- You can make a pattern if you are sewing with a group. If it's just 1 or two kids, get out a yard (or meter) stick and have them help measure the triangle shape.
NY State Sheep and Wool Festival - Kids' Crafts!
While the workshops are FREE with your $5 admission fee, there is advance registration required. Click here to find out more.
Kids of all ages will enjoy these traditional crafts with a modern twist.
Yarn Dolls! These little dolls are so simple, yet very addicting to make. Get ready to use up all your bits of yarn and scraps. Saturday, October 17, 10am EST
Paper Plate Weaving! Say hello to fall with a door hanging that even the youngest crafters can manage. Saturday, October 17, 1pm EST.
Baa Baa Softie Sheep! Stitch up a cuddly sheep of your very own from an old sweater and felt. Sunday, October 18, 1pm EST.
Hope to see you at the NY State Sheep and Wool Festival!
Cupcake Softie
Join in the fun by following Sew a Softie on Instagram and tagging any softies you make #sewasoftie.
Tips for Teaching Virtually
Throughout the week, I was constantly reflecting on how the camp was going from both the teacher and student perspective. What was working (and not working!), how could I use the experience in my classroom teaching, and what tips could I share with other educators? So, here is my take on the week. I hope that you find it useful and will share your own experiences or ask questions in the comments.
Keep the Zoom Open
After a quick morning meeting, I taught my first lesson then had the kids get to work independently while still on Zoom. By keeping the video chat open, students were able to ask questions as needed, held responsible for work, created a virtual classroom community. We were functioning much like a traditional classroom setting where students worked independently while a teacher roamed the classroom or did a quick grading of papers. When campers had questions, they just unmuted themselves and asked. During this independent work time, I was prepping for the next lesson, helping my own children, and answering emails. There was something very comforting seeing each other working.
Having the Zoom open helped me manage camper progress guide as needed. At a scheduled time, I got everyone back together, we shared our work, learned something new, and repeated the process. The Zoom was on all morning from 9-11:30 am and then again in the afternoon from 1-4pm. While we used Zoom for camp, the same concept applies for any video chat application.
Use a Combination of Live Lesson and Recorded Lessons
While creating Google Slides and recording close-ups of hands-on activities takes time, it pays off in the end. The combination of live and recorded lessons also means that the written lessons don't have to be super detailed because you can help to fill in the blanks and answer any questions. When teaching a lesson, I went through the slides with campers and we watched the videos together. They were then able to immediately ask questions and I could check for understanding before I set them off to work. During independent work time, they could go back and watch videos as needed.
Recording hands-on activities allows students to see teaching clearly and close-up. Another idea is to use a document camera or your phone to show close-up work during a live lesson. You can record these lessons to be used later for students who missed class or to use as review.
Have Extensions for Early Finishers
This is always a problem, right? What do you do with those who work quickly? Both Liz and I had extensions for campers who had extra time on their hands. These lessons were placed at the end of the Google Slides for the day.
I was thinking about how in a traditional classroom, students could also have independent studies on topics of their choice that they could start to work on when they finished the core curriculum.
Daily Schedules are Important
Having a predictable daily schedule will help both you and families stay on task. While you'll need to be flexible, it's really nice to know that you're going to do the same things every day like morning meetings, check-ins, breaks, and finish times. The day "zoomed" by and everyone was happy and felt successful.
We also got feedback from students about what they needed in terms of time and instruction. If the majority of campers needed more time for a task, it was given. If there was a group that was ready for the next step, I taught it and was also there to support those that were struggling. Because were were using Zoom and there were 2 instructors, breakout rooms were super helpful.
Yes, there were some bumps in the road, and not everyone completed every project, but for the most part the camp was a big success. Campers were engaged, busy, and making.
Hand Sewn Mask
Cut out both pieces of fabric.
Put the fabric together with the good sides facing out.
To make a pleat, fold the fabric in half and then fold the bottom portion in half again. You may have to try this a few times to get it right. Hopefully the photo will help you understand this step. The simplest version is to make 1 big pleat. After you have some experience making masks, you may want to make 2 or 3 pleats.
Pin the pleat in place on both sides. You want to make sure that the bottom edge is hanging over the bottom of the pleat just a little.
Time to make your ties. Cut strips about 1 inch wide from the bottom of a T-shirt. The strips should be at least 15 inches long. Stretch out the strips a bit. They may curl and that's what you want! You can use elastic if you have it.
Sandwich the ties between the 2 layers of fabric and pin in place. I find it easier to pin down 1 side and then sew it and then do the other side.
This is what the side should look like before you start to sew. The pleat is pinned and the ties are sandwiched and pinned in place. TIP: If you are having trouble with the ties, you can always go back at sew them on after stitching all the way around the mask.
Start sewing! Starting at the top, stitch several times to make sure the tie is sewn tight. Give it a little tug to make sure. Using a whipstitch, sew along the edges of the side, being sure to sew through all the layers of the pleat.
One side is sewn. Now, whipstitch along the long edge of the mask. When you get about halfway to the other side, stop and pin the ties in place.
Keep sewing all the way around the mask until you are finished, then knot off. After trying on your mask, you may need to trim your ties or resew any areas that aren't sewn down tight.
Keep safe and healthy! Please note that this tutorial is for personal use only. Here are some tips for wearing masks in public that I found useful.
Selfie Pillow
First, using the directions in Sewing School Quilts, make a selfie square. We used 8x8 squares of muslin for our selfies. This size seems to be a good beginner size.
Next, decide on the pillow fabric and make a quick pattern for the panels that will go around your selfie. Our finished pillows are about 12 inch square.
To make this size, you'll need patterns that are:
2-1/2 x 8 inches (cut 2)
2-1/2 x 12 inches (cut 2)
*Note that you you can just measure and cut the fabric.
Lay the 8 inch pieces along the sides of your selfie.
Open up the entire panel and iron the seams on the back flat to one side.
Using your selfie panel as a pattern, cut out the backing fabric. See how the good sides are facing? This will make it easier to sew and ensure that the back and front are the same size.
Leaving a hole along the bottom for stuffing, sew around the selfie. Stuff until it's soft and then hand sew the hole closed.


