Showing posts with label lessons. Show all posts

Sew a Fluffy Cloud Softie


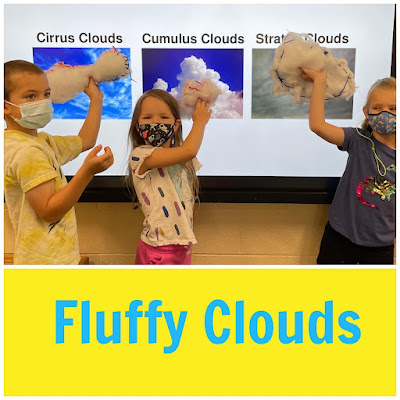
As part of the 2022 Sew a Softie Global Kids Sewing Party, I stitched up some Fluffy Clouds with a group of 4 and 5 year olds. Yep, preschoolers can sew too! It's all about having the right tools for little hands to use. 
Materials Needed: 2 layers of low-loft batting, markers, scissors, plastic needles and lacing strings. You can also make clouds using felt and regular sewing needles and thread. 

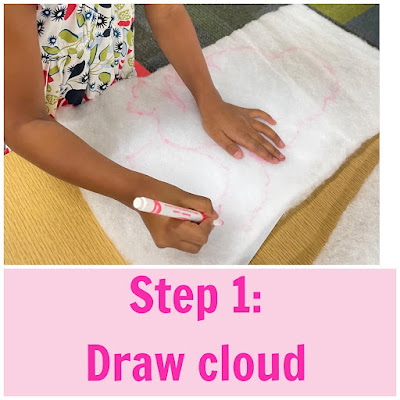
After learning about how clouds are formed and drawing several clouds on paper, draw your cloud shape right onto the double-layer of low-loft batting. Drawing on batting is a bit tricky, and you might need to combine clouds to get the right shape, but it is a fun, new experience. 

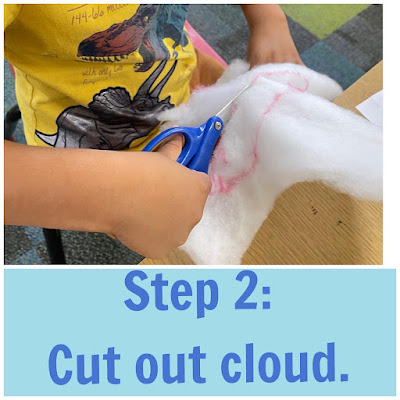
Next, cut out the cloud shapes. Be sure to cut through BOTH layers of batting and take your time! Save the batting scraps to use as stuffing. 

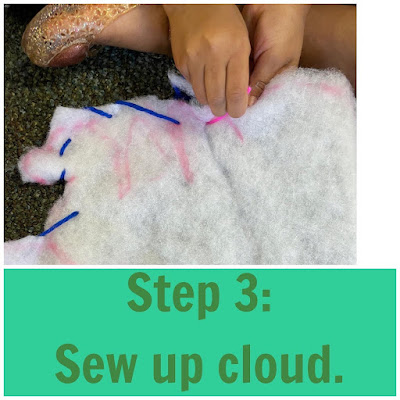
Now it's time to sew up the clouds! We used plastic needles and lacing strings, but you could also use regular needle and thread for this. The plastic needles slide through the batting easily. 

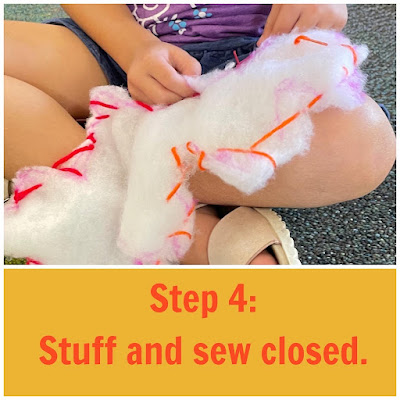
Be sure to leave a small hole (about the size of your hand) for stuffing! Use the batting scraps or polyfil to stuff the cloud until it's soft and squishy. Now, sew the hole closed and be sure to make a knot at the end of sewing.


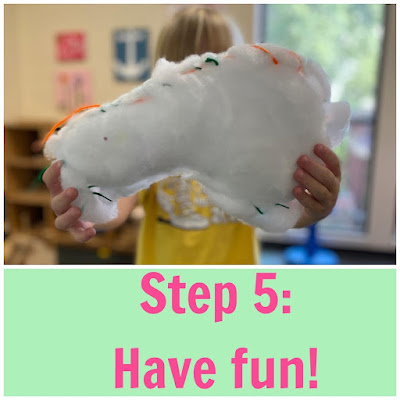
You have a fluffy cloud! They make great pillows, are great for throwing up in the sky, and enjoy getting hugs too. 

What kind of cloud did you make? A cirrus, cumulus, or stratus cloud?

Sew a Softie is a world-wide initiative led by the amazing Trixi Symonds. Follow along on IG at @sewasoftie to see all the amazing tutorials and kid-friendly projects.  

Hand Sewn Mask

I never imagined that I'd be adapting a mask pattern for kids, especially one like this, but here I am. Like everyone around the world, we are doing our part to keep each other and ourselves safe and healthy during these uncertain times. I've been watching so many sewists around the world take action and stitch up masks for health professionals and other essential workers during this time. Now citizens, children included, are being asked to wear masks as a precaution.  This is scary stuff for both adults and children. 


While sewing masks with my daughter last weekend, I began to think of all my little Sewing School kids who have the power to sew and keep themselves safe. It feels good to use your skills to help yourself and others. So, I began to reimagine the tutorial from Made Everyday into a simpler, hand sewn version that both beginner sewists and children could make.

Materials: woven cotton fabric (quilting fabric, sheets, old woven clothing), a T-shirt, scissors, basic sewing supplies, paper for pattern making, chalk or marking pen

Pattern: You'll want to use a ruler to create a pattern that will fit your face. 
basic - 8x5 inches, kid-sized (under 10 years old) - 7x4 inches, large - 9x6

After preparing your pattern, trace it onto your woven fabric 2 times. I am using 2 different kinds of fabric, but you don't have to do that.
Cut out both pieces of fabric.
Put the fabric together with the good sides facing out.
To make a pleat, fold the fabric in half and then fold the bottom portion in half again. You may have to try this a few times to get it right. Hopefully the photo will help you understand this step. The simplest version is to make 1 big pleat. After you have some experience making masks, you may want to make 2 or 3 pleats.
Pin the pleat in place on both sides. You want to make sure that the bottom edge is hanging over the bottom of the pleat just a little.
Time to make your ties. Cut strips about 1 inch wide from the bottom of a T-shirt. The strips should be at least 15 inches long. Stretch out the strips a bit. They may curl and that's what you want! You can use elastic if you have it.
Sandwich the ties between the 2 layers of fabric and pin in place. I find it easier to pin down 1 side and then sew it and then do the other side.
This is what the side should look like before you start to sew. The pleat is pinned and the ties are sandwiched and pinned in place.  TIP: If you are having trouble with the ties, you can always go back at sew them on after stitching all the way around the mask.
Start sewing! Starting at the top, stitch several times to make sure the tie is sewn tight. Give it a little tug to make sure. Using a whipstitch, sew along the edges of the side, being sure to sew through all the layers of the pleat.
One side is sewn. Now, whipstitch along the long edge of the mask. When you get about halfway to the other side, stop and pin the ties in place.
Keep sewing all the way around the mask until you are finished, then knot off. After trying on your mask, you may need to trim your ties or resew any areas that aren't sewn down tight.

Here is a little strawberry mask with 2 pleats. This is a nice way to use up some favorite fabrics. I mean, if you have to wear a mask, you might as well look cute!

Keep safe and healthy! Please note that this tutorial is for personal use only. Here are some tips for wearing masks in public that I found useful. 

Skinny Markers to Go Go

I've been a busy little elf getting ready for the Brooks Museum Holiday Market on December 8.
This year, I've turned my pencil roll into a skinny marker roll.
It's easy to make a change - just add an inch to the fabric width, so it's 8 1/2 x 11 1/2.  Follow the tutorial and make the pockets an inch wide.

I am so happy with them and will have to save one for my kids.  Perfect stocking stuffer!

Gift Card Cozy

You know those people who you really don't know what to get and you think a gift card is the way to go?  Well, you can still give them a little bit of handmade goodness with a gift card cozy.  I started making these for the Brooks Museum Holiday Artist Market and couldn't stop - they are so fun to make and super cute too!

These also make great little no-cash wallets.  I use one to hold my ID & credit card when I'm on the go.

Gift Card Cozy Tutorial:

1. Cut 2 pieces of felt 3 x 4 inches. 

2.  Sew together, leaving a short end open.  Use your presser foot for the seam allowance.  Backstitch down just a little longer than usual because you are going to trim the top edge.

3.  Trim around all edges using pinking shears.  (No pinking shears?  That's OK, leave edges as is.)

4.  Iron on patch (see how to below).

5.  Fill with your gift card!

Making the patches:
I made a whole bunch at once - it's addictive!

Materials:  ultra heat'n bond, cute fabric scraps

1.  Cut out an image you like, make sure you have a big border around the image.
2.  Lay it on the heat'n bond, image facing up.  You can lay a whole bunch of images on the heat'n bond and fill it up.  Slightly overlapping the fabric makes it easier to iron.
3.  Put a piece of parchment paper on top of the fabric/heat'n bond and iron.  If you've never used heat'n bond before, read the directions before.  The parchment paper will help to make sure that your iron doesn't get all sticky.
4.  Cut around the images you want.
5.  Peel off the back of the heat'n bond and iron onto your gift card cozy.
The fun part is choosing just the right cozy for each loved one!  Happy gift card giving!

Tiny Tooth Pouch

We have lots of Kindergarteners with wiggly teeth.  After losing a few already this year, we decided that a Tiny Tooth Pouch would be a perfect project while talking about the letter T.

They are super simple to make and a great project for a young sewer.  They can also be a simple wallet or pouch if you don't have a need for tooth pouch.
Material List:  Felt squares cut into thirds, craft thread and number 22 chenille needles, stick-on velcro cut into about 2 inch strips, and tiny tooth patches.

To make the tooth patches, I used Ultra Heat-n-Bond and white muslin.  Back a piece of white muslin with the Heat-n-Bond and then cut out your tooth pieces.  A friend also suggested sticking on the pouch with spray adhesive.

Time to Make the Pouches:
Fold the strip of felt in half.  This way, the kids only have to sew up 2 sides.  Some of mine got fancy and sewed up the long ends so that the fold was at the bottom while others just sewed around 2 sides so that the fold was on the side.  Either way is fine.

It was a bit hectic sewing with 16 kids at once, so no sewing pictures were taken!  We did pre-thread about 20 needles which made things go much, much smoother.

Once the pouch is sewn up, you can add the tooth pouch - peel off the backing and iron the pouch on.  Add the Velcro as well.  I like to iron on the Velcro a little so that it'll stick better.
You can write on your tooth patch if you want.  We just used Flair pens.
Here are two examples showing the different ways you can sew up the pouch.  Don't you love those kindergarten stitches?!
Now, it's time to loose some teeth and wait for the Tooth Fairy!  Before making our pouches, we read some good tooth related books including my favorite - My Wobbly Tooth Must Not Ever Never Fall Out by Lauren Child.

Locker Chalkboard

 This variation of the Locker Pocket was big hit in Sewing Club.  Instead of making the big photo frame pocket, a piece of chalk cloth was added.  Perfect for jotting down quick notes between classes!
 Here's the basic layout.  A square of chalk cloth at the top with a few little pockets on the bottom.  A small pocket is needed for holding a piece of chalk.  A medium sized pocket is good for other little items or an eraser.  Ribbon cut 12 inches makes a perfect hanger.

The best eraser is a scrap of felt.  We made ours by attaching a rectangle of felt to a piece of craft thread.  It works like a charm and is there when you need it.  Some decided to put a scrap of felt in a pocket.
 This project has so many variations - no two look alike.  I love the heart owl on the one above.
About using chalk cloth:  While chalk cloth is a ton of fun, young sewers may have trouble sewing it onto the felt because it's quite thick.  These examples are from my Advanced Sewing group of 3rd and 4th graders who had fun using the sewing machines.  While you can buy chalk cloth at a variety of fabric stores, we got ours at Oilcloth Addict, which had awesome customer service and has a great selection.

Locker Pocket

Locker decorations are all the rage at our school.  Our first Sewing Club project this year was a Locker Pocket. It's the perfect place to show off a favorite photo and jot down important notes.

They would also be handy hanging on a fridge or great as Mother's Day gifts.

Start with a felt backing piece that is 6 1/2 x 11 inches.


The photo frame pattern is 6 1/2 x 6 inches.  The hole in the middle fits a 3 x 5 photo.  Trace the photo frame onto cotton fabric.  Cut out the photo frame and position it onto the felt backing.

Sew around three sides of the photo frame leaving the top open so you can slide a photo into the frame.
 Now it's time to add the Post-It size pocket.  Make the pocket 4 x 4 inches. 
 Sew the pocket onto the felt backing.
Now cut out a little pencil pocket and sew on next to the Post-It pocket.
Add 12 inches of ribbon or trim to make a loop at the top.  Sew each end of the ribbon to each side.
To keep the top of the Locker Pocket from curling, stabilize the top by hot gluing a large popsicle stick to the top. You could also use a dowel rod or stiff cardboard.

Hang the Locker Pocket from a hook or magnet and you're in business!

As you can imagine, this project lends itself to many variations.  This one is hand-sewn, but it can easily be machine sewn.  You can also make just a bunch of little pockets or change the size of the backing fabric to meet your needs.  Stay tuned for many different kid-made versions. 

Chapstick Holder

What a handy way to keep your chapstick near when you need it.  The kids at Sewing Club loved this one and made several to give to family members as gifts. 

Supplies:  Felt scraps, stick on hook and loop tape, hook or ring for attaching, hand sewing supplies
 
 Make a simple pattern if you are making these with kids.  Ours was 8-1/2 x 2 inches.  Put a dotted line for a fold line 1-1/2  inches from the top.

Trace your pattern with chalk one time and cut out.
 2.  Line up the fabric with the pattern.  Fold the bottom up to meet the dotted fold line.  Pin in place.
 3.  Sew up the two sides.  You can use a running or whipstitch.
 4. Add about an inch of stick-on hook and loop tape to the top tab.  Press down hard so it will stick.
5.  Sew on a little hook so you can attach the chapstick holder to your bag. We found that attaching the hook to a little  piece of ribbon worked well.
6.  Now, add your favorite chapstick, hook onto your bag, and go!

There are so many variations for this project!  As you can see from the pictures, decorations (sticky foam pieces) were added.  You can also machine sew, make with cotton fabric, or close with a button.

I'm also thinking that this would be great for those face sunscreen sticks that I am always losing in my pool bag!