Showing posts with label beginnings. Show all posts

Sew a Fluffy Cloud Softie


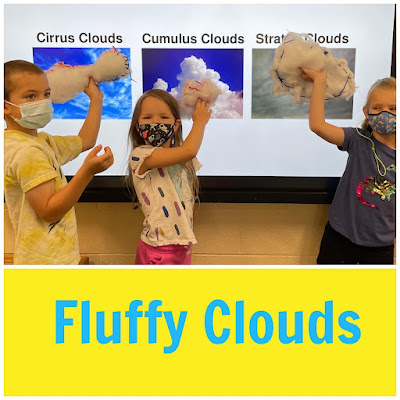
As part of the 2022 Sew a Softie Global Kids Sewing Party, I stitched up some Fluffy Clouds with a group of 4 and 5 year olds. Yep, preschoolers can sew too! It's all about having the right tools for little hands to use. 
Materials Needed: 2 layers of low-loft batting, markers, scissors, plastic needles and lacing strings. You can also make clouds using felt and regular sewing needles and thread. 
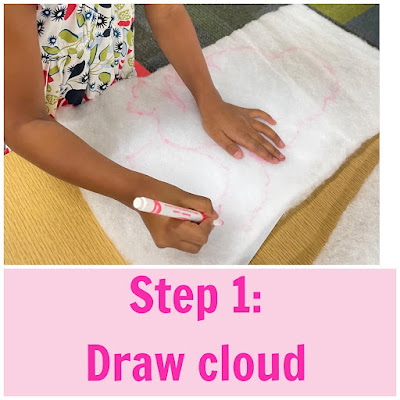
After learning about how clouds are formed and drawing several clouds on paper, draw your cloud shape right onto the double-layer of low-loft batting. Drawing on batting is a bit tricky, and you might need to combine clouds to get the right shape, but it is a fun, new experience. 
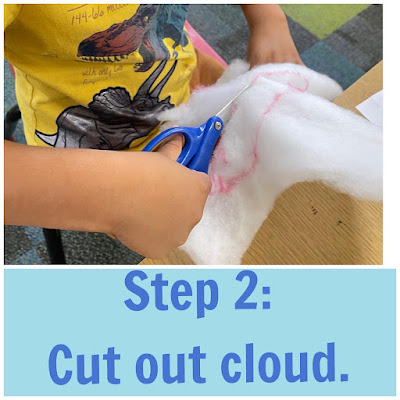
Next, cut out the cloud shapes. Be sure to cut through BOTH layers of batting and take your time! Save the batting scraps to use as stuffing. 
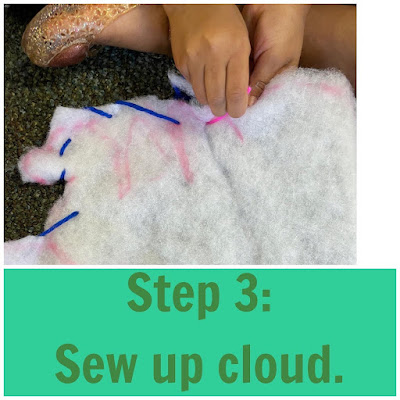
Now it's time to sew up the clouds! We used plastic needles and lacing strings, but you could also use regular needle and thread for this. The plastic needles slide through the batting easily. 
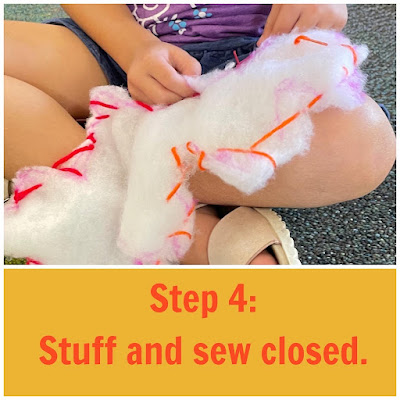
Be sure to leave a small hole (about the size of your hand) for stuffing! Use the batting scraps or polyfil to stuff the cloud until it's soft and squishy. Now, sew the hole closed and be sure to make a knot at the end of sewing.
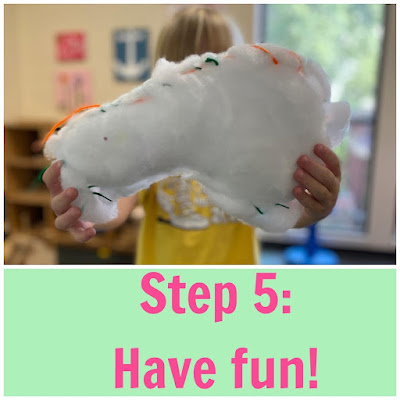

You have a fluffy cloud! They make great pillows, are great for throwing up in the sky, and enjoy getting hugs too. 

What kind of cloud did you make? A cirrus, cumulus, or stratus cloud?

Sew a Softie is a world-wide initiative led by the amazing Trixi Symonds. Follow along on IG at @sewasoftie to see all the amazing tutorials and kid-friendly projects.  

NY State Sheep and Wool Festival - Kids' Crafts!


I'm over the moon to be leading the Kids' Activities at the 2020 NY State Sheep and Wool Festival! Although the event is virtual this year, it's still packed with fun and TONS of great workshops, lectures, and fun. Hope you can join me for some woolly fun!

While the workshops are FREE with your $5 admission fee, there is advance registration required. Click here to find out more.

Kids of all ages will enjoy these traditional crafts with a modern twist. 

Yarn Dolls! These little dolls are so simple, yet very addicting to make. Get ready to use up all your bits of yarn and scraps. Saturday, October 17, 10am EST


Paper Plate Weaving! Say hello to fall with a door hanging that even the youngest crafters can manage. Saturday, October 17, 1pm EST.

Baa Baa Softie Sheep! Stitch up a cuddly sheep of your very own from an old sweater and felt. Sunday, October 18, 1pm EST.

Hope to see you at the NY State Sheep and Wool Festival!

Remembering Mr. Rogers

The new documentary Won't You be My Neighbor was a wonderful reminder as both a teacher and parent of how to respond to, talk with, and show respect to children. I was part of the generation that grew up watching Mr. Rogers' Neighborhood. He was a big part of my early childhood. My favorite was The Land of Makebelieve and hoping that Lady Evelyn would appear. She was a little bit wicked, and I liked that!

Sadly, my own children were not avid fans of the show. We tried a few times to get them to watch, but it didn't stick. We did have the opportunity to visit the Children's Museum of Pittsburgh when they had a big Mr. Rogers exhibit back in 2009.


The original pieces of the set brought back so many memories and it was fun to share them with my kids. They are so little in these photos - those overalls!


Looking at these pictures now, I see the wonder in their faces and know that they understand the power of Mr. Rogers.


Watching the documentary, I was reminded that it's important for every child to feel safe, loved, and acknowledged. So many times when working with children, I can begin to get impatient and am quick to judge and dismiss their feelings and ideas. Now, I'm not saying that children should be indulged and allowed to do whatever they want, but I do think that offering them the opportunity to share their ideas and stories helps children to feel heard. It's the kid version of venting.

So, as I start to think about a new school year (gasp!), I hope to hold on to the ideas and understanding of Mr. Rogers throughout the year (or at least for the first month!). Wouldn't it be nice if my classroom was as friendly as Mr. Rogers' Neighborhood? Maybe I need to break out my cardigans. I already have the Keds!


Sew a Softie Story


Once upon a time there was a group of young sewers who wanted to sew a softie, but not just any softie, a Magical Unicorn softie!


They had heard about the adventures of Uni the Unicorn and fiercely believed that unicorns (and little girls) were very real indeed.


They gathered their supplies and began to draw their unicorns' faces. Each face was different. Some unicorns were smiling, some were sleepy, and a few were sad.


Next, it was time to cut, cut, cut out all the parts that make a unicorn a unicorn like a horn and mane. Some had yellow horns, and few were pink!


Finally, the pieces were pinned and sewn together. Sewing through all the layers of felt and fabric was a little tricky, but these little girl sewers did not give up! Not one sewer poked themselves or said it was too hard.


And you know what's next, right? It's stuffing time! This is the best part where a softie becomes a softie!  Don't forget to sew up your hole so you can go on Magical Unicorn adventures!


And they all lived happily ever after!  (Even the little girl who decided to make a dog instead of a unicorn.)  Happy Sew a Softie Month!


Sew a Softie in July!


Yay!  Sew a Softie Month is happening again during the month of July. This awesome idea started by Coloured Buttons is a world-wide effort to share the love of sewing with kids everywhere and get them sewing!  There are even Kid Ambassadors!  


This year, Sewing School will be one of several blogs and makers stitching with kids and sharing tutorials for projects.  Here is the list of participants.  I can't wait to see what everyone makes!


I'll be back on July 10 with a fun tutorial with my son Frank, one of the official Kid Ambassadors. Until then, you can follow along by liking Coloured Buttons on FaceBook


Happy Sew a Sofie month!

Snowman for Every Story - a Tutorial


I designed this simple snowman face for a Sew Me a Story event at my school. It turned out so cute and everyone loved it.
The beauty of this project is that it can easily go with any snowman themed story and is open to interpretation-something I always love.

So, gather up your favorite snowman stories, some batting and a few other materials, and get ready to create!

Materials needed:
You can make this project with foam sheets, plastic needles and lacing strings like I did for toddlers, or use felt, craft thread chenille needles if sewing with older kids.
*medium-loft batting (this weight is still easy to sew through and allows the face to keep its shape for hanging)
*foam sheets or felt squares in a variety of colors
*hole punch if using foam
*sewing supplies: plastic needles and lacing string or chenille needles and craft thread
*8-inch plate or circle for pattern

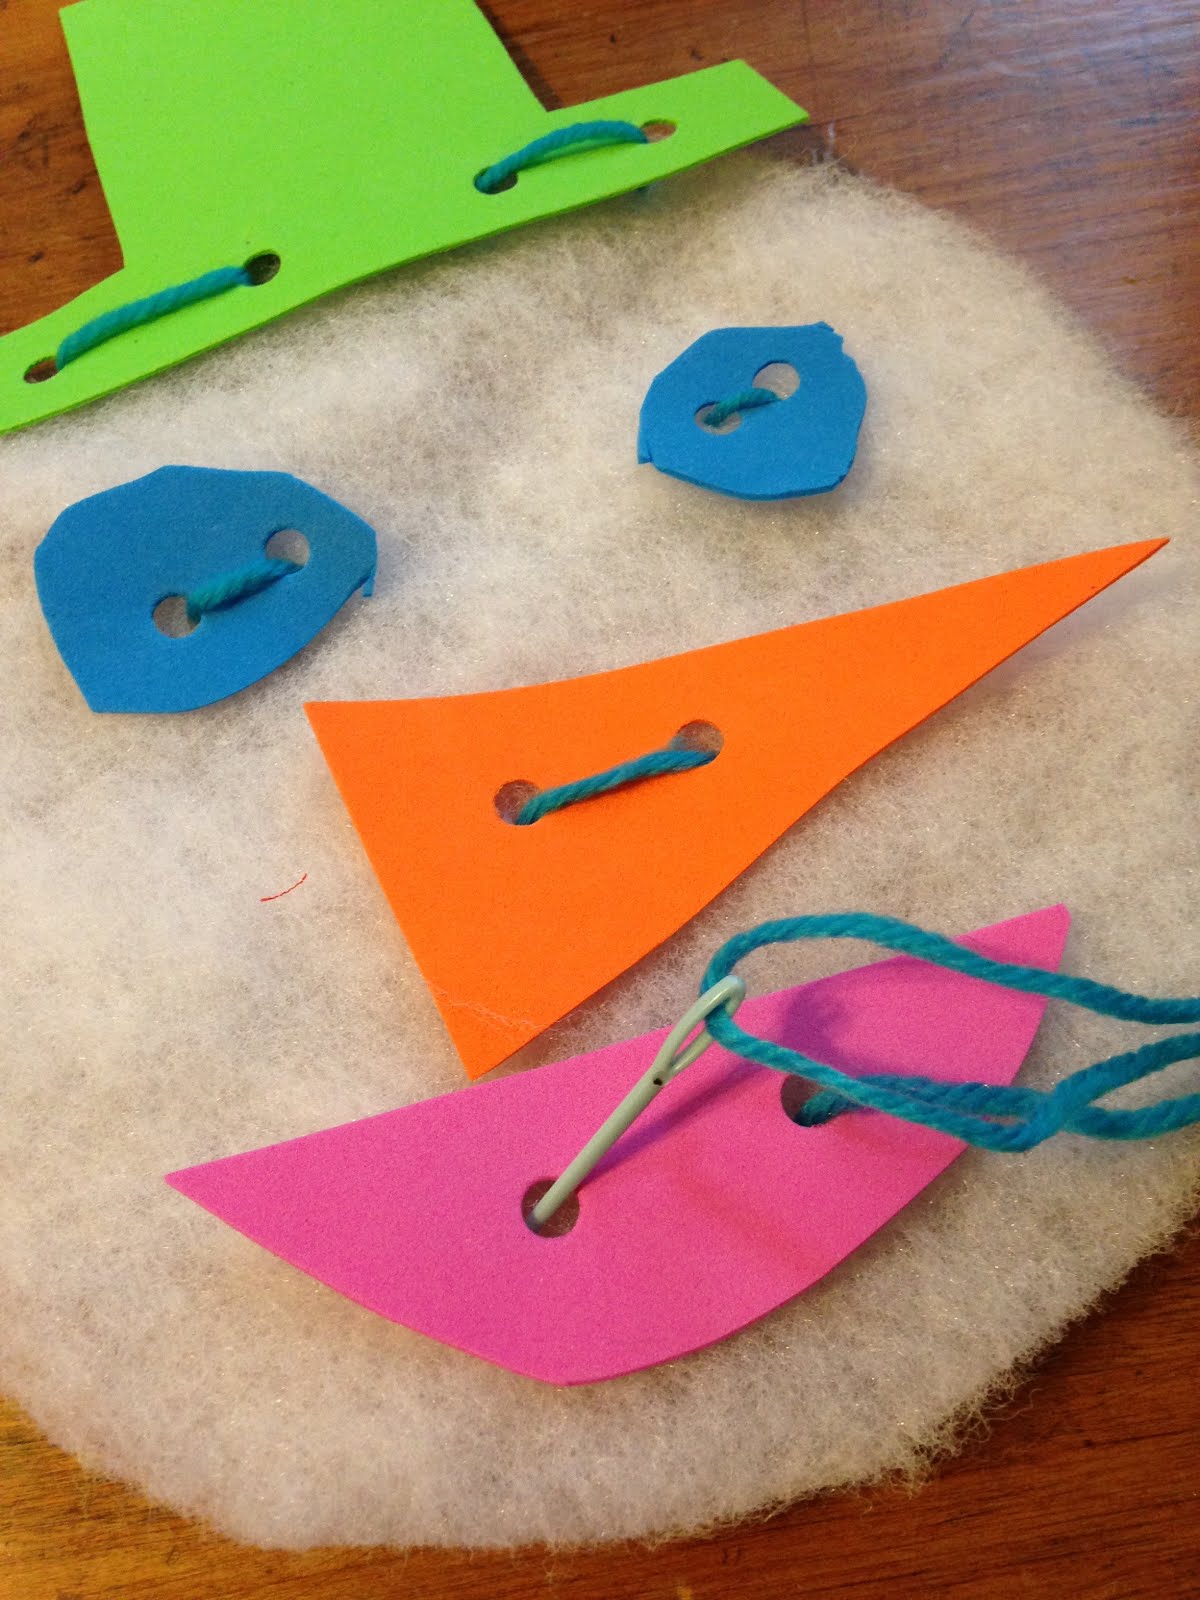
Step 1: Trace the 8-inch plate or circle onto the batting and cut out. You need 1 circle for each snowman face.

Step 2: Cut out fun hats, mouths, noses, and eyes from the foam or felt. If using foam, punch at least 2 holes in each shape.

Step 3: Tie a knot onto the end of your string and begin to sew on the face shapes.

Step 4: You can keep using the same string to sew on the face, just move the string and needle around the back. When you are finished, knot off. Use the extra string to make a hanger on the top of the hat.

Now, all we need is snow....

Toddler Takeover!


I'm super excited to be part of the Toddler Takeover at the Woodruff Art Center in Atlanta, GA this weekend (June 4-5)!  As part of their Eric Carle exhibit and the premiere of the play Pancakes Pancakes, the theme is all things Eric Carle.
 I'll be leading Sew Me a Story workshops based on three different Eric Carle books.  The festival is just right for kids ages 1-5 and is sure to be fun!
I can't wait to sew with a new batch of little sewers!  If you have any peeps in the Atlanta area, please pass the word.  I'll be stitching on Saturday and Sunday.

Sewn Sunflowers

 Sunflowers are one of my favorite flowers! They bring such joy and a promise of summer.

For our preschool "Sew Me a Story" series, we decided to stitch up sunflowers that will last all season long.   We read the wonderful Camille and the Sunflowers  to gain inspiration and get us started.  While we love this book about Vincent vanGogh, there are so many wonderful sunflower books out there like To Be Like the Sun and The Tiny Seed.

 The first step is sew the middle. Cut 2 pieces of burlap using a CD as the template.  You can certainly make the flowers larger if you like.  
Sew all around leaving a hole for stuffing.  Scrunched up tissue paper makes great stuffing for these little sunflowers.  After stuffing the circle, stitch up the hole.
Now it's time to add petals!  We used craft foam for the petals since we sewed with plastic needles, but older kids could use felt.
 Each flower needs about 5 petals.  The kids loved choosing their petals.
Every sunflower needs sunflower seeds!  We let the kids cut out seeds from black felt and use glue stick to attach them to their flower.
 For the stem, we hot glued a bamboo skewer into the flower.  This way, they can easily be stuck into a pot.
 When kids finished, they had fun using oil pastels to create sunflower masterpieces.  With preschoolers, it's always important to have an "I'm finished" activity to keep them engaged.
Love this little field of sunflowers!

Little Aprons

 We started off our new preschool "Sew Me a Story" series by making these cute aprons with pockets.
Our inspiration was Eric Carle's My Apron.  I found this gem in the public library and was immediately inspired to sew an apron.  After reading the book, we discussed ways that they might use an apron.  Cooking?  Gardening?   Building?
I prepped the burlap aprons for these 3-5 year olds by machine sewing on about 18 inches of ribbon on each side.  I also cut out pockets in various sizes and colors of burlap.  They loved choosing the perfect pocket to sew onto their apron!
 Using plastic needles and lacing strings, the kids carefully stitched on the pockets.
 I was surprised by how many kids just took off sewing!
 After stitching on their pockets, the kids drew paper objects to put into their apron.  There were lots of flowers and tools and even this dinosaur!
We enlisted several fourth graders to help us.  They were so sweet and it was great to see many of the kids we sewed with at this age, now teach sewing!
Everyone was so proud of their aprons and were excited to wear them home!